
Most of us do not often change the furniture: the familiar interior creates a special atmosphere of comfort and warmth. There are other explanations for this – to buy a new “furnishings”, as they used to say, is not cheap. Therefore, many home masters are trying to update their favorite, but lost sight and rickety from time interior elements and restore with their own hands. But even if there is no experience in such work, you can learn how to repair furniture on their own, and it is better to start with the restoration and reupholstering of chairs.
Breathe new life into your favorite chairs by removing worn upholstery and replacing it with new upholstery.
And reupholstering is also a great way to blend your favorite furniture into the color scheme of the room’s updated interior. The method of reupholstering will depend a bit on the type of chairs.
To start the work, you need to buy the necessary materials in advance. Their list in each case may vary, but there is a list that is always used.
- upholstery fabric (its color and density of the master will choose to taste, in accordance with the design of the apartment);
- stuffing;
- thick paper or cardboard to make a pattern;
- PVA glue;
Repackaging the chair
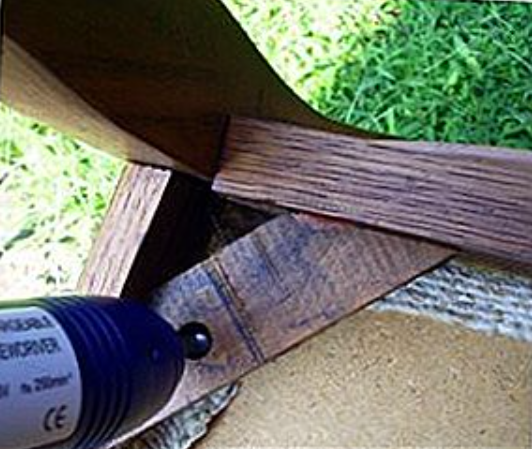
Turn the chair over and unscrew the seat from the frame.
After removing the seat, repair the wooden part of the chair or repaint or tighten the joints. Make sure everything is dry before installing the seat.
Note:
When the tack strip comes out, instead of the screw an extended strip of cardboard with tack holding the sheet to the frame, lift the sheet with a flat slotted screwdriver.
Remove the old fabric
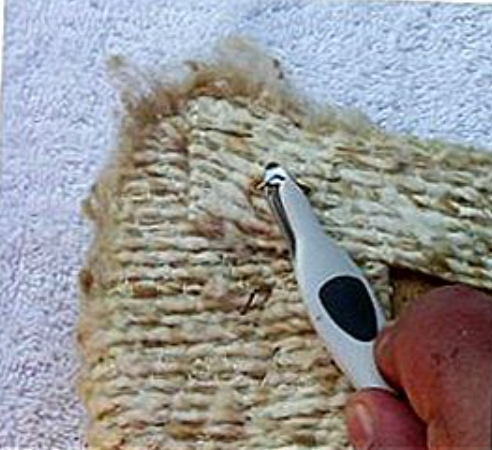
Turn the seat upside down.
Remove the old fabric with a staple remover. When the staples have hardened, remove them with pliers.
Save the old sheet. It should be used as a pattern.
Note:
Add a new bump layer if the padding is poor or if you need a softer seat. It is sold at most textile and hobby supply stores. Use the steps on pages 5-7 to add a seat instead of new fabric to the seat.
The drawing should be around your chair
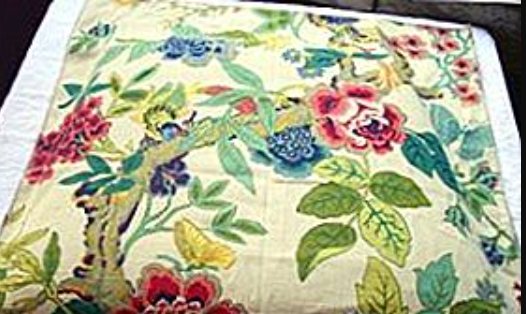
If there is a pattern on the new sheet of fabric, place it on top, face up. Center the pattern by pressing on the perimeter of the seat. Mark the corners with straight pins.
If your fabric does not have a pattern, you can skip this step.
Cut the new seat upholstery
Note:
There is no need to cut new fabric in this case. Since the fabric was originally a sample fabric from a furniture store, it is no larger than an old seat cover, and the edges are already protruding, so it won’t be mussed. Because the cotton is lightweight, it won’t bind the excess fabric in the corners and is too thick to be sewn.
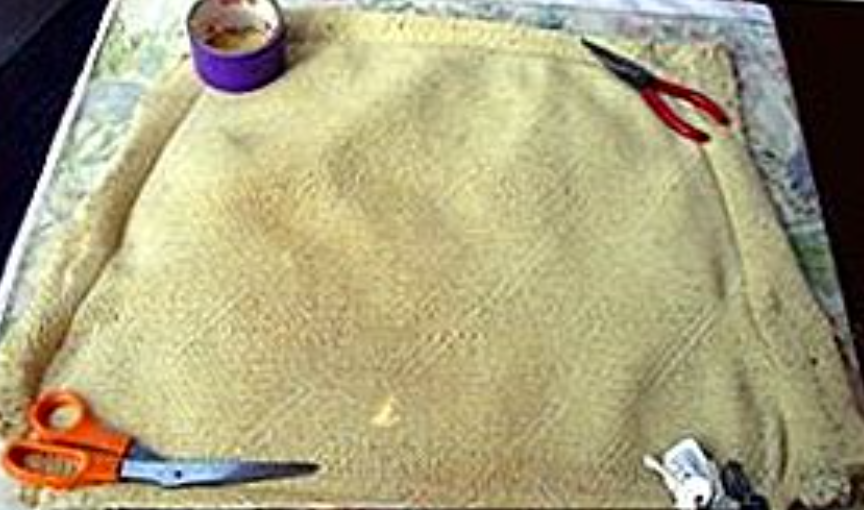
- Lay the new fabric face down and the old seat upholstery as a sample.
- Note the position of the pins and adjust them downward if necessary.
- Align the corner folds of the old seat upholstery with the straight pins.
- Lighten the weight of the old upholstery in the corner and trace the old upholstery with a pencil or chalk.
- Smooth the edges with your hands so that the new handle is not too small.
- Existing seat covers can be stapled to the new fabric before you get to work.
- Remove the old seat cushion and then cut the new one along pencil or chalk lines.
- To avoid snags, zigzag the edges of the fabric with your sewing machine. If you don’t want to sew, fold the ribbon over the edges.
- If it is wrinkled or creased, press the fabric down.
Attach the fabric to the canvas
- Turn the new seat upholstery to the right. Place the seat cushion to the right. Start on the right side.
- If you have pins to mark the edges of the patterned fabric, make sure they match the edges of the seat cushion.
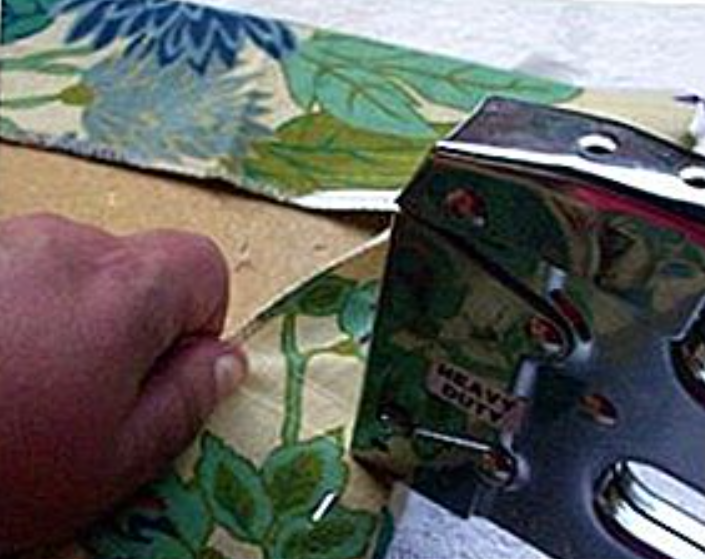
- Start at the top edge and staple it in the middle.
- Stretch the fabric tightly, repeating the bottom edge before stitching.
- Repeat the same on each side and stretch the fabric before stitching.
- Work on only one side at a time and sew from the center so that this side is completely stitched. While sewing, gently pull the fabric under the center to soften it. Do not remove the edges.
- Repeat on all sides until everything is sewn but the corners are not sewn together.
Stick to the corners
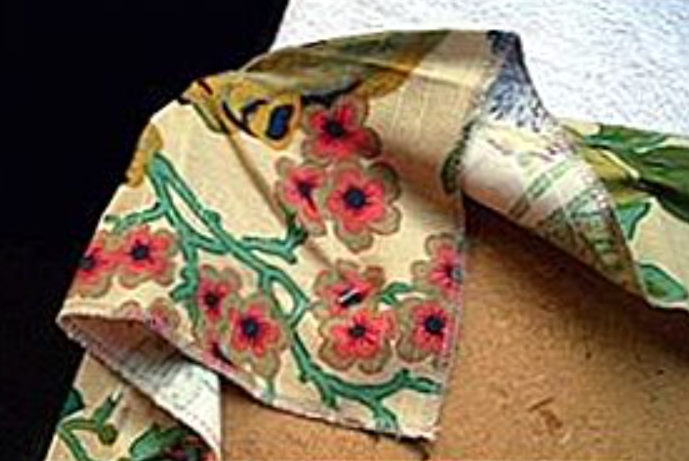
- Grasp the edge of the cover and pull it toward the center of the pad. Staple.
- Make small creases on the remaining uneven corner fabric and tighten tightly. Staple.
- Make sure the screw holes do not overlap the staples.
- Repeat steps 1-3 for the remaining three corners.
Trim with edging
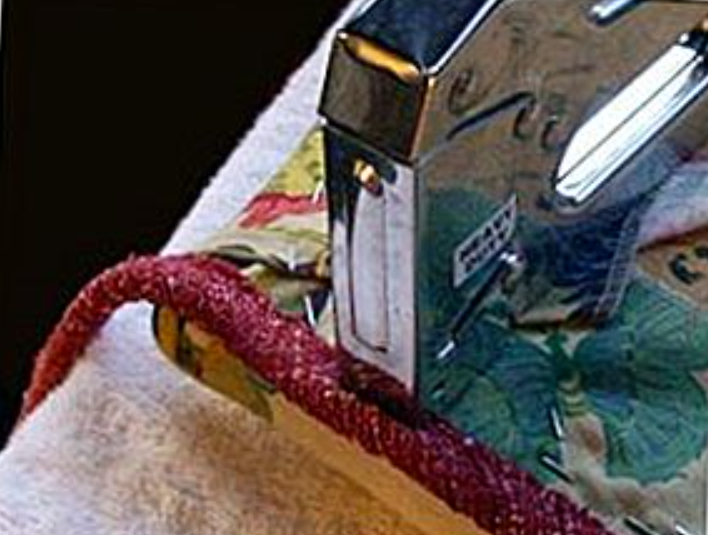
This step is optional.
Finishing is often referred to as strapping or coding. It can be used to give the seat a professional and finished look, which in this case will be a nice touch. You can buy decorative braid at a fabric or upholstery store or make it yourself.
To apply this layer, place it along the edge of the sheet and secure it with staples in the waistband. When you turn the sheet over, only the rounded corners with the braid should remain.
Assemble the seat and enjoy
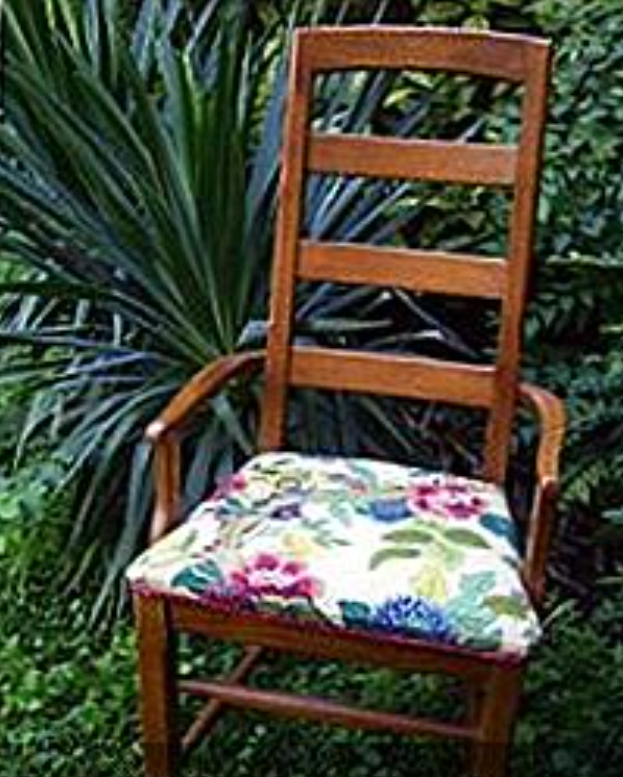
- Place the seat on the chair frame. Align the screw holes in the seat and the chair frame.
- Turn the screw. The seat will not fall off if you turn the chair over.
- Turn the chair over and tighten the screws until the seat is secure. Be careful not to overtighten. You don’t want to clear the hole.
- Evaluate the new chair.
Hints:
- If there is a pattern or pattern on the fabric, the fabric should be positioned so that it faces up, toward the back of the chair. Keep this in mind as you prepare the center blank of the chair. It is better to try your hand at first on monochrome fabric than to create unnecessary problems for yourself while you are still inexperienced.
- All the pieces of fabric you take off should be kept together in a plastic bag. Then you can use them again if you want to, and they will be on hand.
- Be careful when removing the covering. If you want to use it again, you need to avoid rips and cuts. Moreover, you may damage the wood in the process, so keep this in mind when removing the fabric. If you want to use the old upholstery again, remove it carefully and do not touch it unnecessarily.
Warning:
- If you pierced your skin with an old nail, staple, etc., see a doctor and get a tetanus shot. If your furniture is old, it’s better to be reassured than to cry later. If you’re up to a big project, or if you’re a part-time draper, it’s better to get a tetanus shot in time.
- Wear safety glasses when removing nails and staples. You can’t predict when a piece of sharp object might fly into your face, so it’s best to take precautions.
- If you are unsure of the condition of the padding or if it is too old, it is better to wear a mask. A lining that comes off the fabric can release a cloud of dust and get into your airways. If you suffer from allergies, a mask would be especially helpful.
That’s it, the repair is over. As you can see, restoring a chair isn’t that hard if you want to. Enjoy your updated vintage style chair!


